Painting with the Brush Tools
You use the available Brush tools — Full, Adaptive Gaussian, and Local Otsu — to paint selections on 2D views in single slice or multi-slice mode and to label visual voxels in 3D views. You can change the diameter of the brush, as well as select a Round or Square brush to work with.
|
|
Icon | Description |
|---|---|---|
|
Round brush |
|
If selected, the brush will be a circle (single slice) or a sphere (multi-slice). |
|
Square brush |
|
If selected, the brush will be a square (single slice) or a cube (multi-slice). |
|
Brush type |
- |
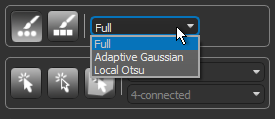
You can choose a brush type in the drop-down menu. as shown below. You should note that additional settings are available for the Adaptive Gaussian and Local Otsu brushes.
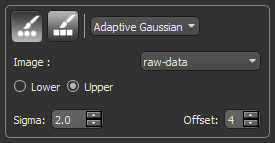
Full… In this case, all voxels within the area or volume of the brush will be labeled. Adaptive Gaussian… Applies a local threshold when painting. In this case, the threshold value is the weighted sum of neighborhood values subtracted by a constant, where the weights are a Gaussian window and the neighborhood is the area or volume of the brush. The dataset that provides the values for computing the threshold can be selected in the Image drop-down menu and you can choose to label pixels within the Lower or Upper range. The Adaptive Gaussian brush settings are shown below.
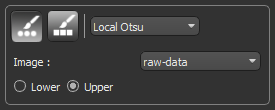
Local Otsu… Applies a local threshold when painting. In this case, the threshold value is determined by maximizing the variance between two classes of pixels of the local neighborhood defined by the area or volume of the Round or Square brush. The dataset that provides the values for computing the threshold can be selected in the Image drop-down menu and you can choose to paint within the Lower or Upper range.
|
- Select the required 2D or 3D view.
- If you are working on a 2D view, select Single slice or Multi-slice, as required (see ROI Painter Tool Settings).
- If you are working in the 3D view, select a working area in the drop-down menu (see ROI Painter Tool Settings).
Note If you are working on the image data, adjust the window leveling so that only the voxels you want to label are visible (see Window Leveling). If you are working on the region of interest, then you will only be able to remove voxels from the selected region of interest.
- Select the Round Brush or Square Brush tool, as required.
- Select a brush type — Full, Adaptive Gaussian, or Local Otsu — in the drop-down menu and the brush settings, if applicable.
- Increase or decrease the brush size, as required.
Note You can use the scroll wheel on your mouse to change the brush size. Brush sizes can also be set in the Brush size box.
- Do the following:
- Hold down Left Ctrl (or your configured Add with key) and then drag to add selections to the current region of interest or multi-ROI.
- Hold down Left Shift (or your configured Remove with key) and then drag to remove selections from the current region of interest or multi-ROI.
Note Refer to Configured Actions for the Brush Tool for additional information about the configured actions for the Brush tool.
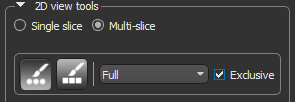
If required, you can automatically re-assign labeled voxels from one region to interest to another by working in Exclusive mode with the Brush tools. For example, in cases in which an automated bone segmentation resulted in voxels corresponding to trabecular bone erroneously labeled as cortical bone or vice versa. In this mode, only the labeled voxels belonging to the selected regions of interest will be affected when painting. This option is available for the Brush tools as shown below.
Exclusive mode
- Select the 2D view in which you plan to edit the regions of interest.
- Select the required regions of interest on the Data Properties and Settings panel.
The selected ROIs are identified as (A) and (B).
- Select a 2D or 3D Brush on the ROI Painter panel.
- Select the Exclusive option.
In this mode, painting will only be applied to the labeled voxels of the selected regions of interest. Unlabeled voxels will not be painted.
- Do the following, as required:
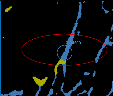
- Add and re-assign labeled voxels to ROI (A) from ROI (B) by holding down Left Ctrl (or your configured Add with key) and then painting.
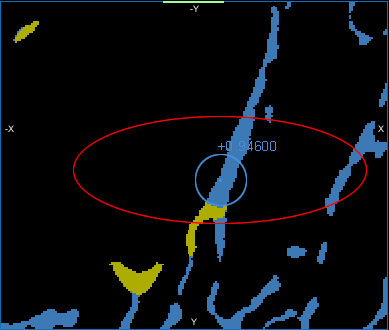
As shown below, only voxels highlighted in yellow are re-assigned to those highlighted in blue when painting in Exclusive mode.
- Remove and re-assign labeled voxels from ROI (A) to ROI (B) by holding down Left Shift (or your configured Remove with key) and then painting.
- Add and re-assign labeled voxels to ROI (A) from ROI (B) by holding down Left Ctrl (or your configured Add with key) and then painting.